
Fixing an XLR Cable
- Taran Willis
- Apr 17
- 3 min read

I've been off work for the past couple days due to an injury, but I thought this would be a good opportunity to talk about one of my main tasks at The RecW: Cable repair.
Cable repair has been one of my largest projects here so far. I've repaired around 20 cables in last 5 weeks and I have come up with a process for basic repairs that I'd like to share.
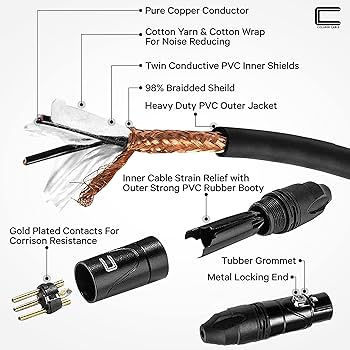
To start, you need a few tools. I use a cable continuity tester, a screw driver, a wire cutter, a pair of pliers, scissors, a heat gun, cable shrink wrap, and a soldering iron.
I test cables through the continuity tester first to see if there are any easiliy identifiable problems. After that, I open up the ends of the cable to see the connection points. Most of the time, a bad connection point is the problem. The copper inside the cable has probably detached from a pin or some similar issue.
Once I've identified the side of the cable which is the problem, I cut the end of it off with the wire cutters. I like to just have an entirely new end to work with, because if a cable has come unsoldered somewhere, that side is mostly unusable. I strip the end of the cable with the wire cutters or a cable stripper if you can find one.
Once you have the cable open, this is what you'll see:
What you do next is unbraid the exposed section of the shield copper to be used as your ground wire. You then want to strip off the ends of the other two wires so their copper is exposed as well. The next step is not necessary, but I find it helpful to put some cable shrink wrap on the ground wire to just give it some shielding and prevent any unwanted copper contact in the cable. You just cut off how much you need, put it on the wire, and heat gun it until it is shrunk onto the ground wire.
The next step is to tin your wires. You just use the soldering iron to melt your solder onto the wires. You just need to make sure that your iron is hot enough to melt the solder, for our irons here, the 4 setting is the sweet spot, but you may find success going hotter or colder.
One your wires are tinned, you need to get the old wires off of the pins. I find it easier to use pliers to give a little pressure on the wire while you melt the solder on it. It makes them slip right out.
Now, it is finally time to solder the new wires onto the pins. You need to make sure the right wire is going to the right pin. This diagram is a good reference point to see which wire goes to which pin:

You can also open up the other side to see which color wire is going to which pin over there, just remember that pins 1 and 2 are swapped on either side.
The easiest way that I've found to solder these wires in is to have pin 3 on top and get the bottom two wires on there before doing 3. This gives it stability and just makes everything go a lot smoother.
Once your cable is soldered together, you're done! Just get everything put back together and continuity test it one more time to make sure you didn't swap your pins.

Comments